Troubleshooting and Support
If you need help using the VRSimulator, we're here to help you! Reach out using any of the following:
 |
|
We're a teensy, tiny team right now. The VR Simulator is a one-person project, so response times will vary. We'll do our best to get back to you ASAP, however. |
Installing the VR Simulator
- Make sure your Unity project meets the requirements for the Immerseum VRSimulator.
Please be sure to install the SteamVR Plugin v. 1.1.1 (or higher) and Oculus Utilities for Unity v.1.8 (or higher). Both are required for the VR Simulator to function, even if you're only targeting one HMD with your project.
- Download the Immerseum VRSimulator.
- Extract the ZIP file to your hard drive.
 |
|
Remember where you extracted the ZIP file - you'll have to find the extracted folder to import the VR Simulator into Unity. |
- Navigate to the folder where you extracted the ZIP file. You should see the file:
vr-simulator-RC-1.0.unitypackage.
- In Unity, open your project (or create a new project).
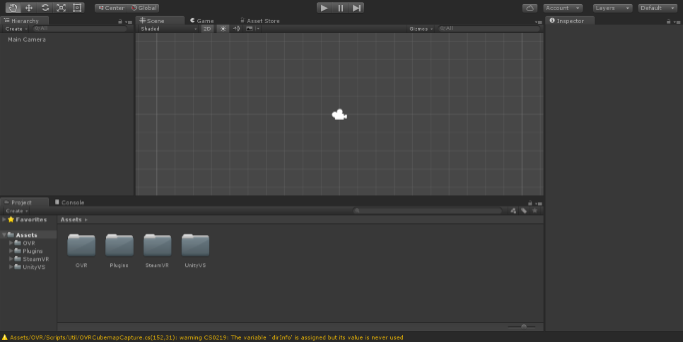
A New Project in Unity |
- Select Assets > Import Package > Custom Package...
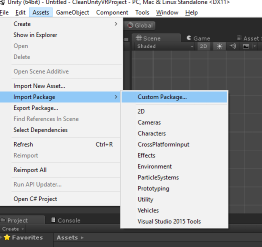
- Find the folder where you extracted the ZIP file. Select the file named: VRSimulator-RC-1.0.unitypackage and click Open.
- You should now see the _ImmerseumSDK folder in your Unity project's Assets. This is where the VRSimulator resides, where you can find its prefabs, scripts, and sample scenes.
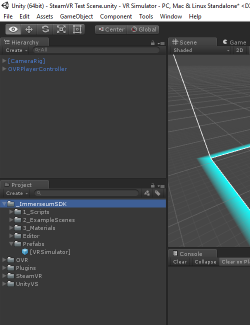
- Drag the [VRSimulator] prefab from _ImmerseumSDK / Prefabs into your scene, and just hit "Play!"
Adding the VR Simulator to Your Scene
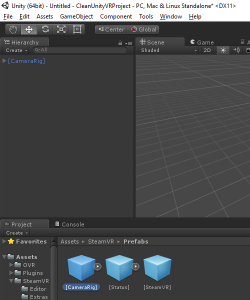
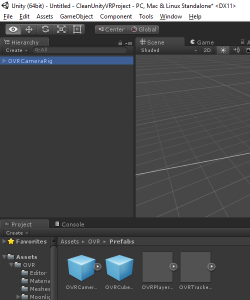
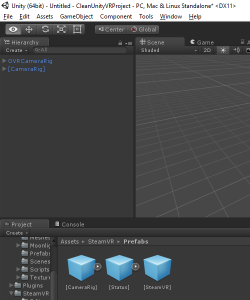
- First, make sure your scene Hierarchy contains a -compatible :
- the SteamVR:[CameraRig] prefab, and/or;
- the Oculus camera rig, using either:
- the Oculus:OVRCameraRig prefab, or;
- the Oculus:OVRPlayerController prefab, or;
| SteamVR:[CameraRig] |
Oculus:OVRCameraRig |
Both SteamVR / Oculus |
 |
 |
 |
- From your project's Assets folder, find the [VRSimulator] prefab:
Assets/
_ImmerseumSDK/
Prefabs/
[VRSimulator]
- Drag the [VRSimulator] prefab into your scene Hierarchy.
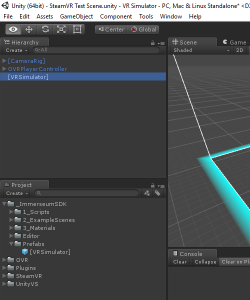
And that's it! The VRSimulator is now set up, and you can either use it right out of the box (just hit Play) or Configure the VRSimulator however you'd like.
What's in the Box?
The Immerseum VRSimulator contains one prefab: [VRSimulator]. You can find it in Assets / _ImmerseumSDK / Prefabs /
Attached to this prefab, you'll find four scripts:
- HMDSimulator. This is the VRSimulator's main script. It controls how the VRSimulator controls your camera, letting you configure what body position (Seated, Standing, Custom) you're simulating, whether to simulate controllers, and what type of object to use for controller simulation. [ Configuration | Scripting ]
- ControllerManager. This script lets you configure how your simulated controllers behave. It determines their starting position, configure their colliders and rigidbodies, etc. [ Configuration | Scripting ]
- MovementManager. This script lets you configure how your player/avatar moves in the scene. It also lets you disable Immerseum's default if you want to supply your own. [ Configuration | Scripting ]
- InputActionManager. This script lets you apply Immerseum's input settings to your project's Input Manager configuration and disable Immerseum's default if you want to supply your own. [ Configuration | Scripting ]
- PlayAreaManager. This script lets you configure whether and how the VRSimulator simulates a Play Area in your scene. It determines your play area's size, appearance, and behavior. [Configuration | Scripting]
 |
|
We've tried to be comprehensive about guidance in the editor. Every parameter also has a tooltip (just hover over it with your mouse), and you can also choose to Display Help Boxes (in the HMDSimulator) which will provide further guidance for you in each of the script editors. |
The VRSimulator should run right out of the box - just enter Play mode in the Unity Editor.
How Does It Work?
Looked at from a high level, the VRSimulator generally follows the following path when your VR scene loads:
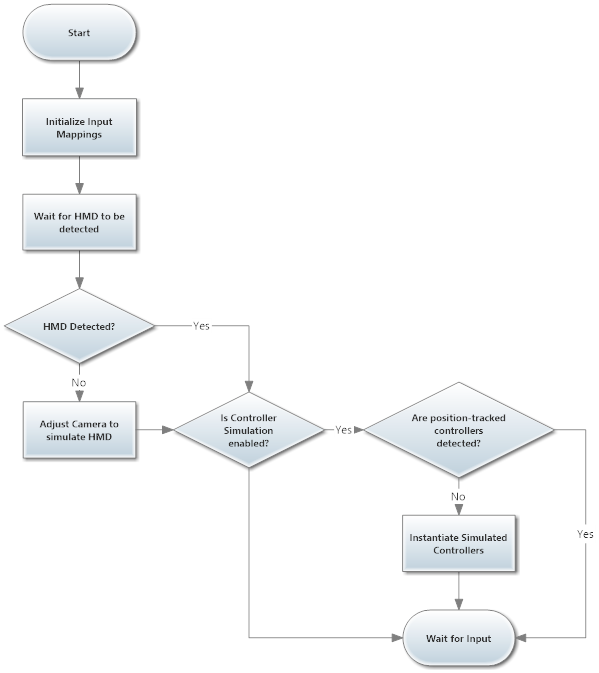
Then, whenever your player generates an Input Action, the VRSimulator fires the event for that Input Action. Any method that listens for the Input Action will then execute.
 |
|
Use Input Action Events to have your VR scene respond to your user's actions the way it would with a connected HMD / controllers.
For example, you can create a method that listens for a trigger pull, and then moves the simulated controller when the user has pulled their trigger.
|
By default, the MovementManager listens for a standard set of Input Action Events, and if one of those events gets fired it will move the user/player avatar or rotate the camera based on the input.
Configuring the HMDSimulator
Editor Settings
The HMDSimulator script exposes the following settings which are configurable within the Unity Editor:
- Disable in Standalone
- If enabled, will deactivate the [VRSimulator] gameobject when running a standalone build of your scene, thereby completely disabling the VR Simulator's functionality when running your project outside of the Unity Editor.
- Display Help Boxes
-
If enabled, will display helpful explanations in the Unity Editor for all VRSimulator scripts (disabled by default).
- Log Diagnostics
- If enabled, will display Immerseum SDK diagnostic messages in the Unity Console (disabled by default).
- Log Input Actions
-
If enabled, will log any to the Unity Console (disabled by default).
- Camera Rig
-
The that you wish to use for simulation. If left empty (default), will use whichever is present in your scene - if more than one is present, will default to SteamVR:[CameraRig].
- HMD Discovery Time
-
Neither the
SteamVR plugin nor
Oculus Utilities for Unity discover a connected HMD right away. It always takes a little time - maybe a few milliseconds, maybe a second or two - depending on your motherboard, graphics card, the resources on your system, etc. This setting lets you configure how many seconds to wait for an HMD before giving up and simulating the HMD. (default: 2 seconds)
-
 |
|
On our testing rigs, we've found that an HMD will typically be discovered in about 1.2 seconds if it's connected. But as this has varied widely (even on the same machine), we've found that 2 seconds (our default value) works well as a good compromise. Your mileage may vary! |
- Height
-
This is the height / position that you wish to simulate. Your options are:
-
- Standing (default) - uses User Profile height if available, otherwise defaults to 1.755 (which for Oculus sets eye-height at approximately 1.65).
- Seated - uses User Profile data if available, otherwise defaults 1.06.
- Custom - If selected, you can enter your own targeted height at whatever value you choose.
- Simulate Controllers
-
If enabled, will simulate controllers if no HMD is detected. (default: disabled)
- Controller Primitive
-
This is the Unity
primitive type that you wish to use when simulating controllers. Your options are:
-
- Cube
- Sphere (default)
- Cylinder
- Capsule
- Custom - If selected, you can select any prefab from your Assets folder. You can use different prefabs for left-hand right controllers if you want.
- Controller Scaling
-
Determines the size of your simulated controller. Assumes each primitive has a size of (1, 1, 1) and scales them up or down appropriate. If using a custom controller primitive, scaling is determined by the prefab itself. (default: 0.05)
Configuring the ControllerManager
Editor Settings
The ControllerManager script exposes the following settings which are configurable within the Unity Editor:
- Starting Position
-
This is the positon / posture in which your simulated controllers will start. Your options are:
-
| Origin |
Simulates "dangling at your waist". They start at more-or-less waist height (lower if seated) and slightly forward of your player avatar's implied body. This slight forward simulation is because players rarely have controllers at rest when in a VR experience, and this lets you more accurately see where your controllers are when in simulation mode. |
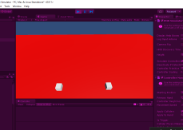
Origin Position | |
|
Forward
(default) |
Simulates "resting on your desk/keyboard". They are at about torso-height and more substantially forward. |

Forward Position | |
| Reaching |
Simulates hands extended out from the shoulder. |
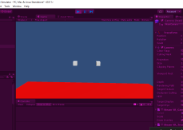
Reaching Position | |
| Boxer |
Simulates a "puglist's pose" with the hands near eye-level, with one (the primary) hand higher and more forward than the secondary hand. |
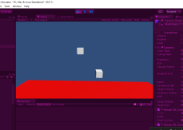
Boxer Position (Primary Hand: Left) | |
| Prefab |
Uses whatever position automatically derives from the simulated controller's primitive (useful if you're using a custom prefab to simulate a controller). |
|
 |
|
When using Play mode in Unity, your simulated controllers might seem really small or really far away. That's an artifact of how the SteamVR plugin and Oculus Utilities for Unity compositors render your VR scene to a regular (non-HMD) monitor. Basically, you're getting some "lens warping" effects when going from a stereoscopic view (in your HMD) to a non-stereoscopic view (on your monitor).
By design, the VRSimulator does not adjust for that so as to maintain positional, rotational, and scaling consistency with your actual VR scene. In other words, so long as you're positioning things relative to your simulated controllers, they should be positioned "properly" relative to your user's controllers when you're actually wearing an HMD. |
- Primary Hand
-
This determines which hand is positioned the furthest-forward when in Boxer position. It is also exposed programmatically, letting you give your player "handedness". Your options here are:
-
- Left (default)
- Right
- Ambidextrous - both hands are treated the same
- Controller Height Adjustment
-
This determines the distance by which the controllers should be offset relative to head height. This is a "magic number" used in downstream calculations - adjust with care! (default: 0.48)
- Movement Speed
-
This determines the rate at which simulated controllers move when moving independently of the user's body. (default: 0.5)
- Apply Colliders
-
If enabled, applies a
Collider to the controller selected by
Apply to Hand. (default: disabled)
-
- Apply to Hand
-
Indicates which simulated controllers should get the
colliders. Your options are:
-
- Left - Only the left-hand controller will get a collider.
- Right - Only the right-hand controller will get a collider.
- Ambidextrous (default) - Both controllers will get a collider (with identical settings).
- Apply Rigidbody
- If enabled, applies a Rigidbody to the controller selected by Apply to Hand. (default: disabled)
-
- Apply to Hand
-
Indicates which simulated controllers should get the
colliders. Your options are:
-
- Left - Only the left-hand controller will get a collider.
- Right - Only the right-hand controller will get a collider.
- Ambidextrous (default) - Both controllers will get a collider (with identical settings).
Configuring the MovementManager
Editor Settings
The MovementManager script exposes the following settings which are configurable within the Unity Editor:
- Default Input Map
-
-
 |
|
If you disable the Default Input Map you will have to provide your own movement mapping through scripting.
|
- Is Strafe Enabled
-
If enabled, movement using an input device's x-axis moves the player/user laterally (side-to-side / strafe). If disabled, movement using an input device's x-axis rotate's the camera from side-to-side (yaw). (default: enabled)
- Is Run Enabled
-
If enabled, the player can run (move at twice the default speed). (default: true)
- Is Run Active
-
If enabled, the player is currently running (movement speed is effectively doubled). (default: false)
- Gamepad Primary Trigger
-
This determines which Gamepad Trigger is considered the "primary" one (by default, primary and secondary triggers are mapped differently and so can do different things). Your options are:
-
Advanced Settings
 |
|
The following are advanced settings that have a significant impact on user experience. Adjust them with caution. |
- Rotation Ratchet
-
Sets the number of degrees to rotate the user when a input action occurs. (default: 45)
- Acceleration Rate
-
Sets the rate at which the user accelerates when starting movement. (default: 0.1)
- Forward Damping Rate
-
Sets the rate by which forward movement is dampened/smoothed. (default: 0.3)
- Back/Side Damping Rate
-
Sets the rate by which backwards and lateral is dampened/smoothed. (default: 0.3)
- Gravity Adjustment
-
Sets the adjustment that occurs to gravity while the player is in motion. (default: 0.379)
Configuring the InputActionManager
Editor Settings
The InputActionManager script exposes the following settings which are configurable within the Unity Editor:
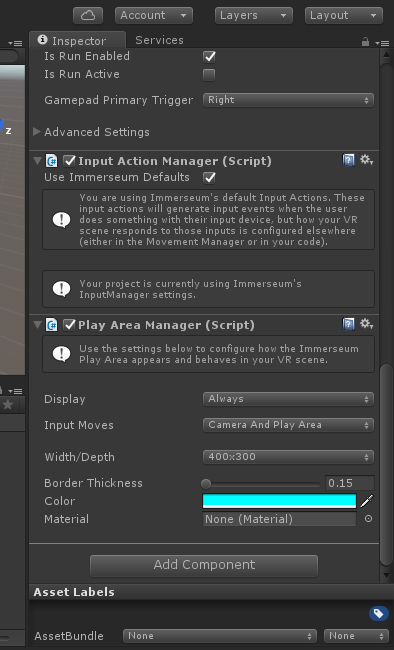
- Use Immerseum Defaults
-
If enabled, applies Immerseum's
default Input Actions. This determines which combination of input buttons, axes, etc. on your different input devices do the same things.
-
 |
|
If you disable Immerseum's default Input Actions but still want to use the VRSimulator's movement management system, you will need to supply your own custom Input Actions. This will require scripting.
|
- Apply InputManager Settings
-
- If your project's Unity Input Manager settings ARE NOT configured with Immerseum's default input axes:
A button will be displayed that lets you automatically apply Immerseum's default settings. When clicked, this button will prompt you to confirm that you wish to over-write your settings, since this operation cannot be undone. When approved, the VR Simulator will over-write your Input Manager settings using Immerseum's default input axes and the button will be replaced with a small confirmation message.
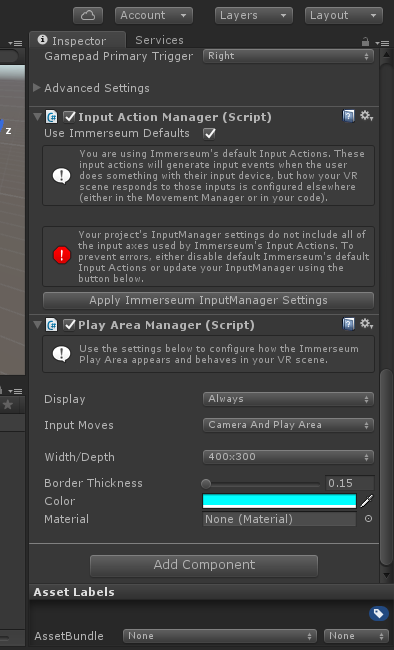
- If your project's Unity Input Manager settings ARE configured with Immerseum's default input axes:
A small message confirming that your configuration meets expectations will be shown instead.
Configuring the PlayAreaManager
Editor Settings
The PlayAreaManager script attached to the [VRSimulator] gameobject exposes the following settings which are configurable within the Unity Editor:
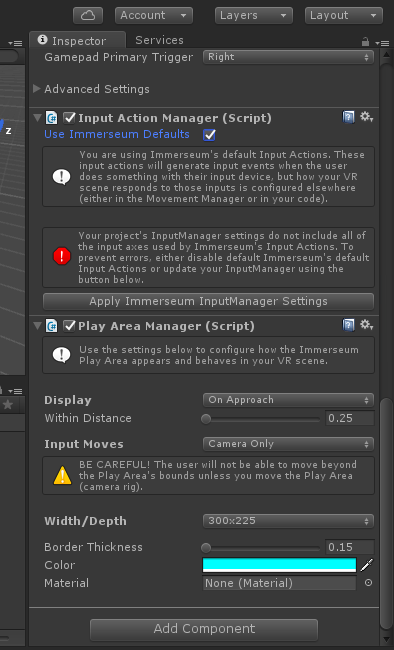
- Input Moves
- Determines what gets moved in response to user input. Available options are:
-
- Camera Only. The is moved, but the range of possible movement is constrained by the Play Area. (default)
- Camera and Play Area. The and the play area are both moved in response to input.
- Display
- Determines when the Immerseum Play Area is displayed in your scene. The available options are:
-
- Always. The Immerseum Play Area is displayed at all times.
- On Approach. The Immerseum Play Area is displayed when the camera rig or the (simulated) controllers come within a configured distance of the Play Area's inner boundary (selected by default).
- On Input Action. The Immerseum Play Area is displayed when the user activates a configurable input action (pushes a button, etc.).
- Never. The Immerseum Play Area is never displayed and is hidden at all times.
-
 |
|
Certain combinations of Display and Input Moves will not work. For example, if you select Input Moves:Camera and Play Area and Display:On Approach, the Immerseum Play Area will never be displayed (because when your avatar moves, the play area moves with it so your distance to the Play Area will never change). |
- Within Distance (applicable if Display is "On Approach")
-
Determines the distance (from the play area's inner boundary) at which the Immerseum Play Area gets displayed. When either the camera rig or either of the controllers gets closer than this distance, the Play Area gets displayed. When they move outside of this distance, the Play Area disappears.
- InputAction (applicable if Display is "On Input Action")
-
The name of the InputAction which toggles the activation / deactivation of the Immerseum Play Area.
[For a list of default Input Actions please see: Default Input Actions] - Width/Depth
- Determines the dimensions of the Immerseum Play Area. Available options are:
-
- Not Applicable. This disables the Immerseum Play Area, provided that an HMD is not currently plugged in. If an HMD is plugged in, the HMD's play area settings will override this value.
- Calibrated. The dimensions of the Play Area will correspond to the calibration of your HTC Vive or Oculus Rift when that calibration is available. It is typically available when the HMD is plugged in. If the calibration is not available, the play area dimensions will default to a size of 3m x 2.25m.
- 400x300. Sets the play area to 4m x 3m in worldspace.
- 300x225. Sets the play area to 3m x 2.25m in worldspace.
- 200x150. Sets the play area to 2m x 1.50m in worldspace.
- Custom. Allows you to define a custom width / depth for your play area.
-
- Border Thickness
- Determines the width of the Immerseum Play Area in worldspace units (meters).
- Color
-
Configures the Color to apply to the Immerseum Play Area.
- Material
-
Selects the Material to apply to the Immerseum Play Area. If empty, defaults to the Unity standard material/shader combination, but applies the color selected above.
Scripting and the VRSimulator
The VRSimulator is designed to be integrated into your scripts quickly and easily, so as to help you truly simulate player interaction in your VR scene(s). As a result, it has an extensive and flexible API built into it that lets you do lots of things:
- Move the simulated controllers whenever (and wherever) you want.
- Detect input from the user across all of the supported input devices.
- Customize how input buttons / axes map to Input Actions.
- Customize how input actions map to movement.
Please be sure to take a look at our extensive Scripting Reference for more information.
See Also
Input & Movement
Scripting Reference
Configuring the VRSimulator


